
Manufacturing
How Custom Patches Are Made: From Artwork to Finished Patch
By the Nation Patches team · Updated · 7 min read
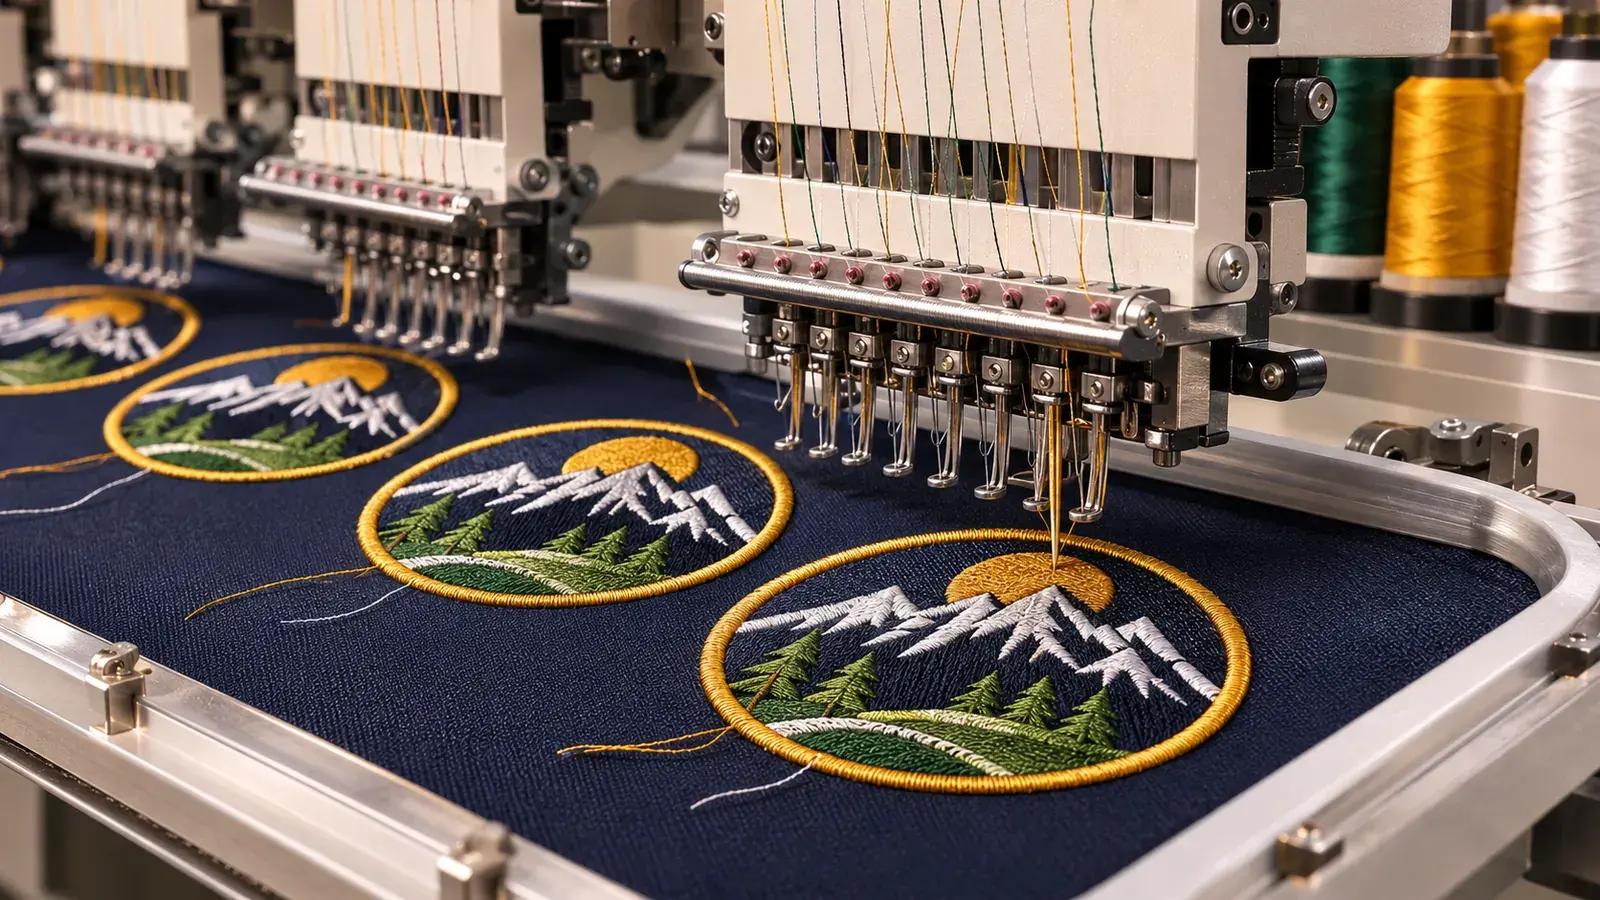
Learning how to make patches starts with one idea: every patch begins as flat artwork. A manufacturer turns that artwork into a stitch file, a weave file or a PVC mold. Next, machines produce the patches. Finally, workers add borders and backing, then inspect every batch.
This guide explains how to make patches of each main type: embroidered, PVC, woven and chenille. It also covers how to make a patch at home with an embroidery machine. That way, you can decide whether to make your own or order from a manufacturer.
How to Make Patches: The Professional Workflow
When factories plan how to make patches, every style follows the same basic path. Only the machines differ. First, the team reviews the artwork for size, color count and small details. Then a designer prepares the design for production, and the buyer signs off on a proof before anything is made.
- 01
Send the artwork
A logo, sketch or photo arrives with the size, quantity and backing in mind.
- 02
Review and quote
The team checks the design, suggests fixes for tiny text or thin lines, and replies with a quote.
- 03
Approve a digital proof
You see a mockup with sizes and thread or color details. Production starts only after you approve it.
- 04
Production and inspection
Patches are stitched, molded or woven, then finished and checked for stitching, color, border and backing quality.
- 05
Shipping
The order is packed and shipped to you with tracking.
You can see how we handle each stage on our patch manufacturing process page. Below, we break down what happens inside production for each patch type.
How to Make Embroidered Patches in Production
Embroidered patches are the most common style. They use colored thread stitched onto a sturdy base fabric. Here is how a factory makes them from start to finish.
1. Digitizing the artwork
A digitizer converts the artwork into a stitch file that tells the machine where every stitch goes. For example, satin stitches suit text and outlines, while fill stitches cover large areas. The digitizer also sets stitch density, direction and underlay. As a result, the patch lies flat and the edges stay sharp.
2. Hooping the twill
Most embroidered patches use polyester twill as the base. Workers stretch the twill tightly in a hoop or large frame, often with a stabilizer underneath. Tight hooping matters because loose fabric puckers and shifts the design.
3. Stitching on multi-head machines
Commercial shops use multi-head embroidery machines. Each head stitches the same design at the same time, and each one holds many thread colors. In addition, the machine switches colors on its own. Thread is usually polyester or rayon, and stitch coverage runs from about 50% to 100% of the patch surface.
4. Cutting and borders
Next, a cutter separates the stitched sheet into single patches. Simple shapes like circles, squares and shields can get a merrowed border, a thick overlock edge sewn on a separate merrow machine. Complex shapes get a heat-cut border instead. In that case, the machine stitches a satin edge first, then a hot knife or laser cuts and seals the fabric.
5. Adding the backing
Finally, the backing goes on. Options include a heat-seal layer for iron-on use, hook-and-loop, peel-and-stick adhesive, or no backing for sewing. Our patch backing guide explains which one fits each fabric. If embroidery suits your project, see our custom embroidered patches page for options.
How to Make PVC Patches: Molds, Color Fill and Curing
PVC patches are made from soft, flexible polyvinyl chloride instead of thread. The process looks more like casting than sewing. That's why PVC handles bold, raised designs so well.
- Mold making. A mold maker separates the artwork into color areas and engraves them into a metal mold. A 2D mold has flat, stepped levels, while a 3D mold has sculpted, rounded surfaces.
- Color fill. Workers mix liquid PVC to match each color. Workers or dispensing machines fill the mold one color at a time, using fine nozzles for small details.
- Curing. After each color layer, the mold goes into an oven so the PVC sets. Then the next color is added on top.
- Base layer and demolding. A final base layer joins all colors into one piece. Once it cools, the patch peels out of the mold and gets trimmed.
- Backing. Hook-and-loop is usually sewn or bonded to the back. Sew-on and adhesive backings are also common.
Because the mold holds the shape, PVC keeps crisp edges and resists water well. For more detail on options, visit our custom PVC patches page.
How Woven and Chenille Patches Are Made
Woven patches
Woven patches come off a jacquard-style loom, not an embroidery machine. Thin damask threads weave the design and background together into one flat fabric. As a result, woven patches capture small text and fine lines better than embroidery. The loom produces long rolls of patches, which are then cut with heat or ultrasonic tools. Edges can be heat-cut, merrowed or folded.
Chenille patches
Chenille patches use thick loop yarn on a felt base. A chenille machine pulls the yarn up into soft, raised loops, often called moss stitch. It also uses chain stitch for outlines and lettering. Workers cut and stack layers of felt to frame the design. This is the classic look of varsity letters and team jackets.
| Patch type | Main machine or tool | Base material | Best at |
|---|---|---|---|
| Embroidered | Multi-head embroidery machine | Polyester twill | Textured logos and classic badges |
| PVC | Engraved metal mold and curing oven | Liquid PVC | Raised 3D designs and wet conditions |
| Woven | Jacquard-style loom | Fine damask thread | Small text and fine detail |
| Chenille | Chenille embroidery machine | Felt | Soft, fuzzy varsity style |
How to Make a Patch at Home: DIY Basics
Yes, you can learn how to make patches yourself. A home embroidery machine is the easiest route, although hand embroidery also works for one-off pieces. Here is a simple method for DIY embroidery patch projects.
- 01
Pick a patch design file
Use a ready-made in-the-hoop patch design, or digitize your own with embroidery software. Keep the design simple and bold.
- 02
Hoop the fabric
Hoop twill or felt with a heavy tear-away or water-soluble stabilizer. Keep it drum-tight.
- 03
Stitch the design and border
Run the design, then finish with a wide satin-stitch border around the edge.
- 04
Cut it out
Trim close to the border with sharp, small scissors. Seal loose fibers with a fray-stop liquid.
- 05
Add a backing
Iron a fusible adhesive web onto the back for an iron-on patch, or leave it plain to sew on.
When Ordering From a Manufacturer Makes More Sense
Knowing how to make patches at home is a fun skill. DIY patches are great for a handful of gifts or a personal jacket. However, a few situations call for a professional maker. Patch making equipment, molds and looms are costly, and they take skill to run well.
- You need many identical patches. Multi-head machines keep every piece consistent across a large run.
- You want PVC, woven or chenille. These need molds, looms or special machines that most homes don't have.
- You need merrowed borders. A merrow edge requires a dedicated overlock machine.
- The patch represents a brand, team or department. Clean digitizing and color matching matter more when people judge you by it.
- You need a specific backing. Factory heat-seal and hook-and-loop backings are bonded with industrial presses.
If that sounds like your project, send your artwork for a quote. Ask our team about quantities and timing, and we'll suggest the best patch type for your design.
Frequently Asked Questions
What machine is used to make embroidered patches?
Factories use multi-head commercial embroidery machines that stitch the same design on several patches at once. At home, a single-needle embroidery machine with a hoop can make simple patches, although it's slower and needs manual color changes.
What fabric is best for making patches?
Polyester twill is the standard base for embroidered patches because it's stable and holds stitches well. Felt works for chenille and many DIY patches. Woven patches don't need a separate base, since the threads form the whole patch.
How are PVC patches made?
A mold maker engraves the design into a metal mold. Workers fill liquid PVC one color at a time, and each layer cures in an oven. Then a base layer joins everything, and the patch is removed from the mold and trimmed.
Can I make an iron-on patch myself?
Yes. Stitch or cut your patch, then bond a fusible adhesive web to the back with an iron. Factory heat-seal backing is usually thicker and more even, so it tends to grip better through washing.