
How-To
How to Iron On a Patch (Step-by-Step)
By the Nation Patches team · Updated · 7 min read
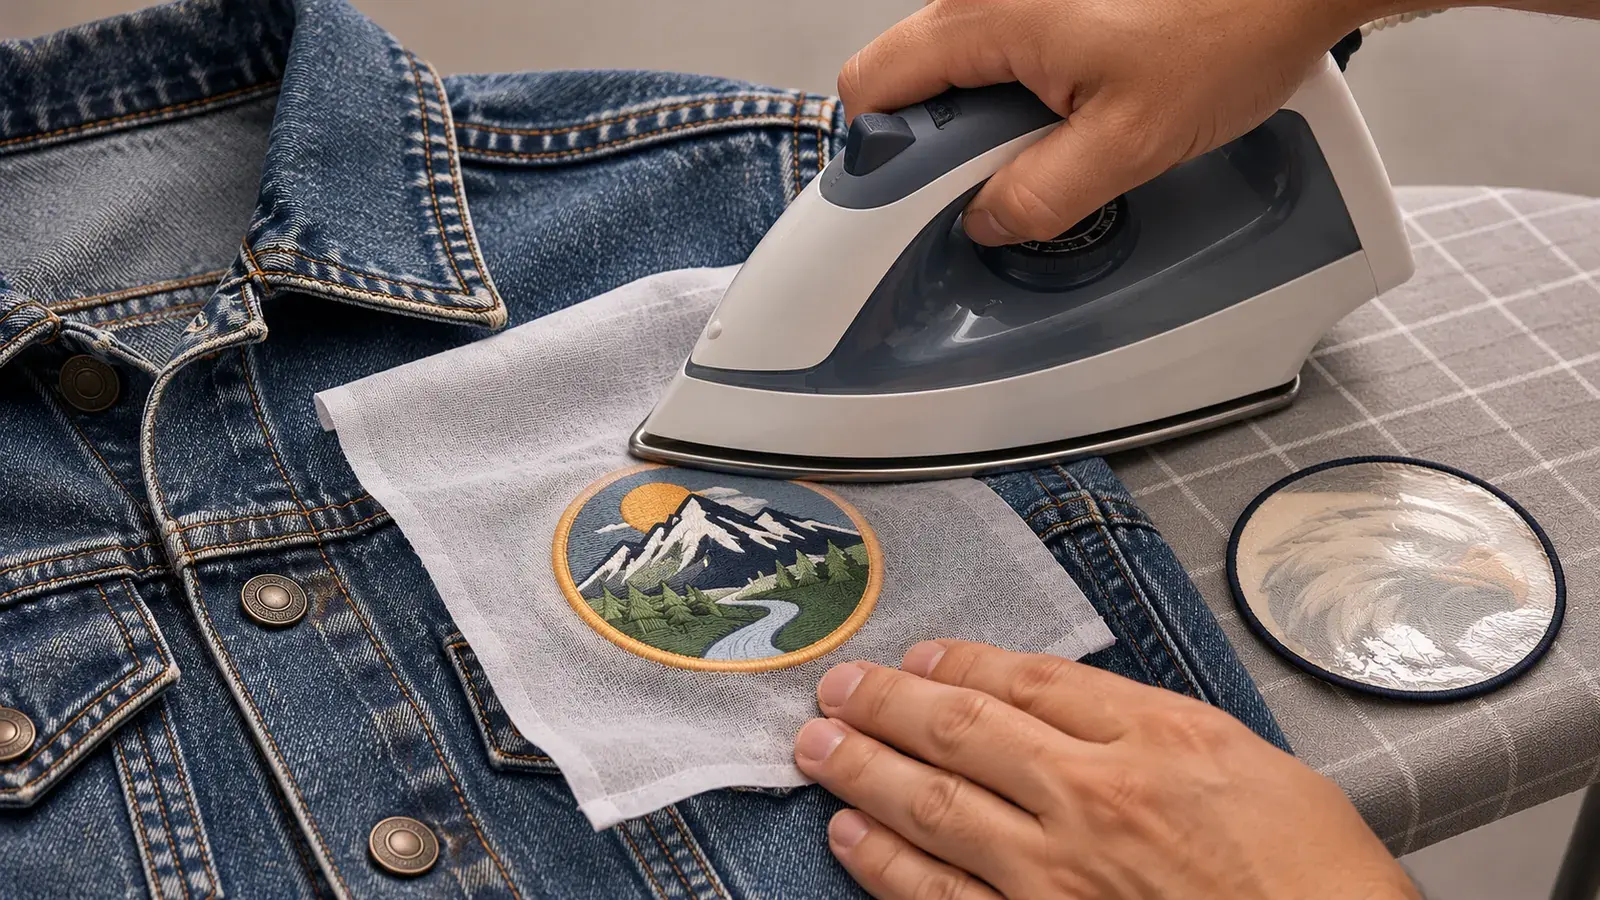
How do you iron on a patch so it actually stays put? Heat a dry iron to the hottest setting your fabric can take. Next, cover the patch with a thin press cloth and press hard for 20 to 30 seconds. Then flip the garment inside out and press the back for another 20 to 30 seconds.
That covers the basics. However, the details decide whether your patch lasts for years or peels off in the first wash. This guide covers temperatures by fabric, timing and the inside-out press. It also shows how to spot an iron-on patch and how to wash it afterward.
How Do Iron-On Patches Work?
An iron-on patch has a thin layer of heat-seal adhesive on the back. This adhesive is a thermoplastic, so it stays solid at room temperature and melts under heat. When you press it, the melted glue flows into the weave of the fabric. As it cools, it hardens again and locks the patch in place.
That's why heat, pressure and time all matter. Without enough heat, the glue never fully melts. Without enough pressure, it doesn't reach deep into the fibers. Finally, if you move the garment too soon, the bond breaks before it sets.
What You Need Before You Start
- Iron-on patch: one with a heat-seal backing (see how to check below).
- Household iron: turn the steam off and empty the water tank.
- Press cloth: a thin cotton pillowcase, tea towel or handkerchief works well.
- Hard, flat surface: a table with a towel on top beats a soft ironing board.
- Clean garment: washed, fully dry and with no fabric softener left in it.
How Do You Iron On a Patch? 7 Simple Steps
These iron-on patch instructions work for embroidered, woven and most chenille patches. In addition, they apply to shirts, jackets, jeans, tote bags and hats with a flat panel.
- 01
Preheat the iron
Set the iron to the hottest setting your fabric allows (see the table below). Give it a few minutes to reach full heat.
- 02
Prep the fabric
Press the spot where the patch will go for about 10 seconds. This removes wrinkles and drives out leftover moisture.
- 03
Place the patch
Lay the patch adhesive side down. Check that it sits straight, because you can't move it once the glue melts.
- 04
Cover with a press cloth
Put the thin cloth over the patch. It protects the thread from scorching and spreads the heat evenly.
- 05
Press, don't iron
Push down firmly for 20 to 30 seconds without sliding the iron. For a large patch, press one section at a time.
- 06
Do the inside-out press
Turn the garment inside out and press the back of the patch area for another 20 to 30 seconds.
- 07
Let it cool flat
Leave the garment flat until it's cool to the touch. Then gently test the edges with a fingernail.
Iron Temperature by Fabric
Heat is the biggest variable. For example, cotton handles high heat, while polyester can melt or shine. Always check the care label first, and then use this table as a starting point.
| Fabric | Iron setting | Press time (front) | Notes |
|---|---|---|---|
| Cotton, denim, canvas | High (cotton setting) | 25–30 seconds | Easiest fabrics for iron-on patches |
| Cotton-poly blends | Medium-high | 20–30 seconds | Use a press cloth to avoid shine |
| Polyester | Medium (synthetic setting) | 20–30 seconds | Press cloth is a must; add time, not heat |
| Nylon | Low | Short test presses only | Often melts first; sewing is safer |
| Rayon, silk, leather, vinyl | Not recommended | N/A | Sew or use hook-and-loop instead |
| Waterproof or coated fabric | Not recommended | N/A | Coatings block the adhesive |
Why the Inside-Out Press Matters
Many people skip this step, and it's the main reason their patches peel. Thick embroidered patches insulate the glue from the front. As a result, the adhesive near the fabric may not fully melt.
Pressing from the back puts heat right where the glue meets the fibers. Because the fabric layer is thin, heat passes through quickly. This step matters most when you iron on embroidered patches with dense, 100% stitch coverage.
Ironing a patch onto a hat
Hats are tricky because the crown is curved and you can't reach inside easily. Stuff the hat with a rolled towel to make a firm surface. Then press with the tip of the iron and roll it slowly across the patch. For crisp results on many caps, a heat press with a hat platen works better. Our guide on using a heat press for patches covers that setup.
How to Tell If a Patch Is Iron-On
Flip the patch over and look closely at the back. Next, run your finger across it. The signs are usually easy to spot.
- Iron-on: a smooth, slightly shiny or plastic-like film that feels a little stiff.
- Sew-on: visible stitches, bare twill or a soft fabric backing with no glossy layer.
- Hook-and-loop: a scratchy hook side or soft loop fabric sewn to the back.
- Peel-and-stick: a paper or film liner that peels away to reveal a tacky glue.
If you see no adhesive, you can still sew the patch on. Our step-by-step guide to sewing on a patch shows how. You can also compare every option in our guide to patch backing types.
How Do You Iron On a Patch That Won't Stick?
| Problem | Likely cause | Fix |
|---|---|---|
| Edges lift after cooling | Not enough heat at the edges | Re-press the edges with the iron tip for 15 seconds |
| Whole patch peels off | Iron too cool or steam was on | Turn steam off, raise heat if the fabric allows, press longer |
| Patch slid out of place | Iron was moved like normal ironing | Lift and press straight down each time |
| Glue stuck to fabric, not patch | Garment moved while still hot | Let it cool fully before lifting |
| No bond at all | Coated, stretchy or textured fabric | Sew the patch on instead |
| Patch fell off in the wash | Washed too soon or in hot water | Re-press, wait 24 hours, wash cold |
Fabric softener and sizing sprays also leave a film that blocks the glue. So wash new garments once without softener before you apply a patch.
How to Wash Clothes With Iron-On Patches
A good bond can last for years with the right care. On the other hand, hot water and high dryer heat can soften the adhesive again.
- Wait at least 24 hours after ironing before the first wash.
- Turn the garment inside out to reduce rubbing on the patch.
- Wash in cold or warm water on a gentle cycle.
- Air dry, or tumble dry on low heat.
- If an edge lifts, re-press it before it catches and tears.
For items you wash often, like uniforms or kids' clothes, add a few stitches around the border. The glue holds the patch flat while the thread adds long-term strength.
Can You Make Your Own Iron-On Patches?
Yes, you can turn a sew-on patch into an iron-on patch at home. Cut a piece of fusible adhesive web to the patch shape, then iron it to the back with the paper liner on. Next, peel the liner off and iron the patch to your garment as usual.
This works for a few pieces. However, a factory heat-seal backing is applied evenly across the whole patch and trimmed to the border. If you need a batch for a team, brand or event, custom iron-on patches arrive ready to press. You can also order iron-on hat patches sized for cap fronts. When you are ready, send your artwork for a quote.
Frequently Asked Questions
How long do you iron on a patch?
Press the front for 20 to 30 seconds with firm pressure. Then turn the garment inside out and press the back for another 20 to 30 seconds. Thicker patches may need a little longer.
Can you iron on a patch without a press cloth?
You can, but it's risky. Direct heat can scorch thread, melt polyester and leave shiny marks. A thin cotton cloth protects the patch and spreads the heat evenly.
Do iron-on patches stay on permanently?
They can last for years on cotton and denim when applied correctly and washed cold. For heavy use, add a few stitches around the border for extra security.
Can I iron on a patch with steam?
No. Steam adds moisture that cools the adhesive and weakens the bond. Empty the water tank and use a dry iron.
Can I iron a patch onto a polyester or nylon jacket?
Polyester usually works on a medium setting with a press cloth. Nylon often melts before the glue bonds, so sewing or hook-and-loop backing is the safer choice.